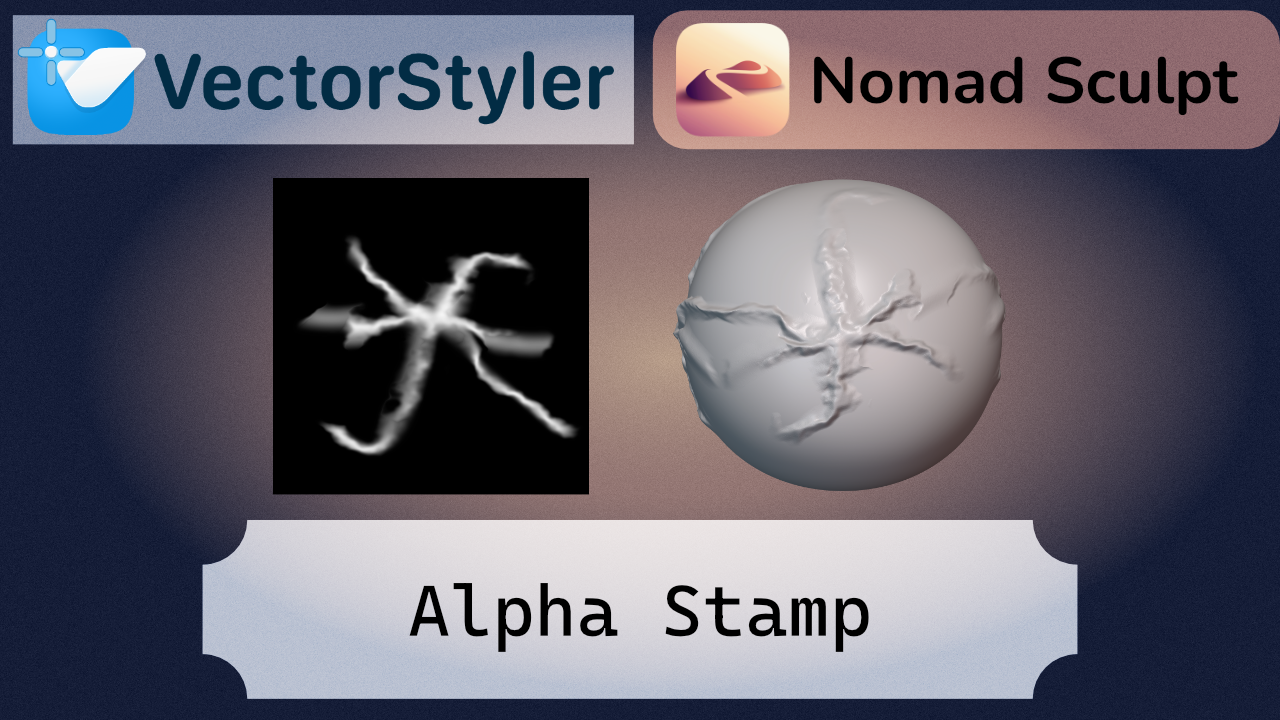
I wanted to make this tutorial because creating your own alpha maps from scratch is an extremely powerful workflow. It gives you full control over the result—for example, selectively adding blur in certain areas can significantly soften the height transitions, which often look too harsh or artificial when using standard alphas. This level of control is difficult to achieve with downloaded maps, but when you build your own, you can get much cleaner and more refined results.
I also wanted to explore this cross-workflow to show that tools from different ecosystems can complement each other effectively. VectorStyler is especially strong when it comes to creating assets, and since these are vector-based, they can be scaled without loss of quality. If needed, this allows you to generate fully scalable textures depending on the requirements of your model.
For this reason, I recommend combining vector-based tools with 3D workflows, rather than relying too heavily on pre-made assets or buying them online. This approach gives you full ownership over your work—everything you create is unique, fully editable, and can be adapted precisely to the needs of your project.
No me morí con el spammeo intenso, pero hoy pusieron los eventos de un juego, y además, tenía sesión de skincare
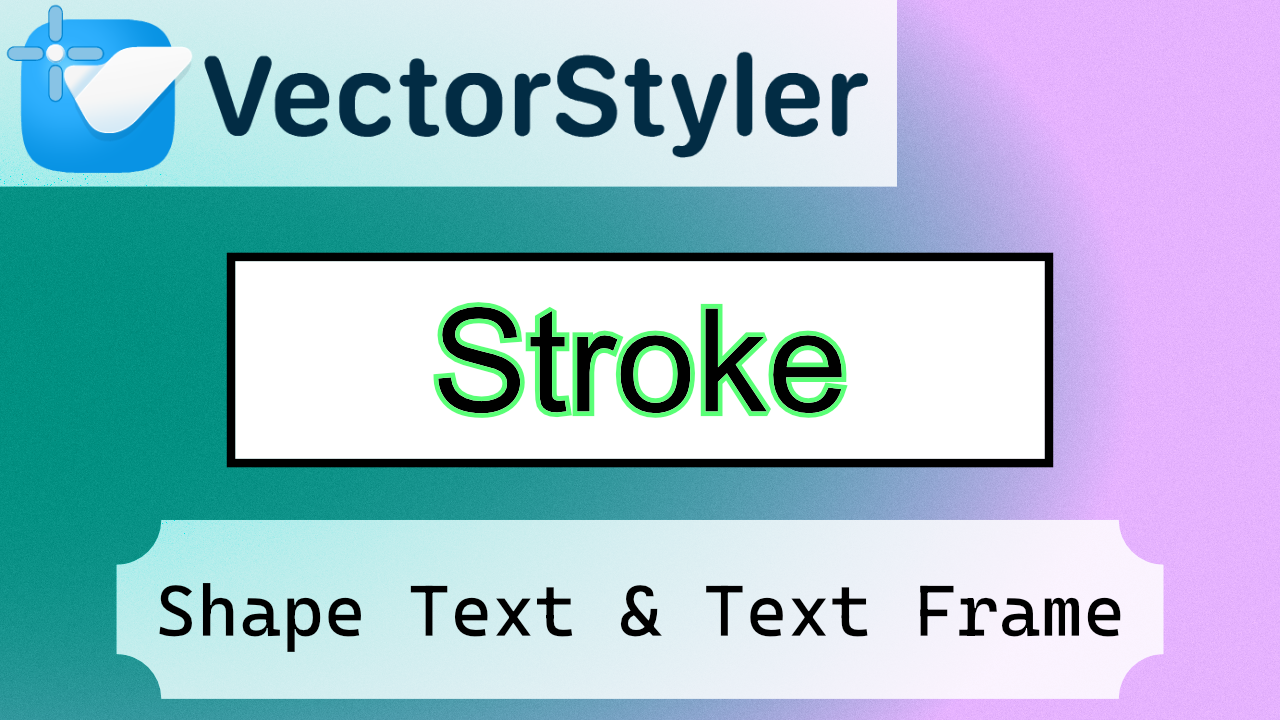
Ah, sí, sobre el tutorial, es simple, pero se puede complicar a veces ponerle stroke al frame text, y está bien para realmente, definir que la diferencia es que en el shape text ya tienes el panel de apariencia, mientras que el text frame debes de entrar específicamente
No se me ocurre tanto que hacer ahora mismo en vectorstyler, porque yo creo que me voy a pasar a otro programa que tampoco tiene tanta comunidad, porque muchas cosas que puedes hacer en vector styler, sirven para por ejemplo hacer alphas, entonces, quizás me interesa preparar algunas cosas de 3D, y enseñar como hacer los materiales en vector styler, que realmente es el uso que le doy, esto solo ha sido una intro
Estoy entre aprender python, o seguir con Blender, pero es muy complicado hacer tutoriales de Blender
Yo todavía no he podido entender cómo poder hacer pelo, y hay pocos tutoriales en ciertos apartados de Blender
Un tutorial para hacer un ojo, sí te hace el ojo, pero pocos te hacen las capas del ojo
Y cuando encuentras uno que sí haces las capas, no está hecho para riggeo porque las coordenadas no están preparadadas, y se debe de emparentar
Así que probablemente me pase a riggeo, a pesar de que no me gusta del todo como está diseño el riggeo en Blender, porque se puede hacer, pero me parece mal que justamente un programa que se enfoca tanto en los nodos, sus riggings no estén enfocados a nodos, sino a emparentar manualmente todo, y por tanto, hay que pasar al riggeo en python para que sea reutilizable, y eso es un dramón, porque el repositorio ejemplar es exageradamente largo, así que tal y como está Blender, te obliga a codear, por eso los addons me caen un poco mal
Porque los addons son botones, realmente, muy pocos addons son originales, que sí los hay, pero yo prefiero no poner addons de comodidad, porque te tapan el programa
Yo llegué a avanzar bastante, dentro todo, pero ahora mismo, hay ciertas coas que sí que me están generando dudas, porque en Maya ya está estandarizado, así que me voy a tener que ver todos los tutoriales y cursos de Maya, por lo menos para refrescar ese apartado, y ver si algún día puedo afiliar el pelo, porque está complicándose
Esa es una de las razones, por la que considero que el tema de vectores, aunque no se use tanto, si se usa dentro de la cadena de 3D, lo mejor es que sea completamente editable, porque aunque hagas las cosas por hobby, es mejor complicarse la vida al inicio, que sufrir al final porque todo está rasterizado
I want to drag a straight segment (or a connection/stroke between two nodes)
- without bending it
- without needing to select the connected nodes one by one first
Can I do that?
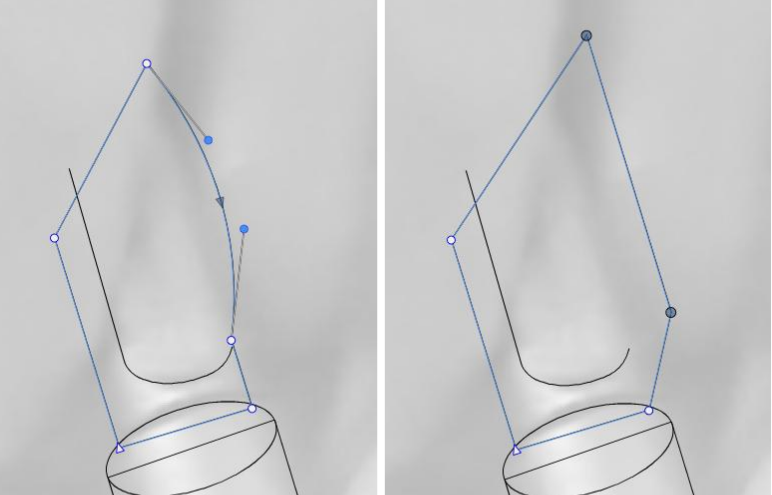
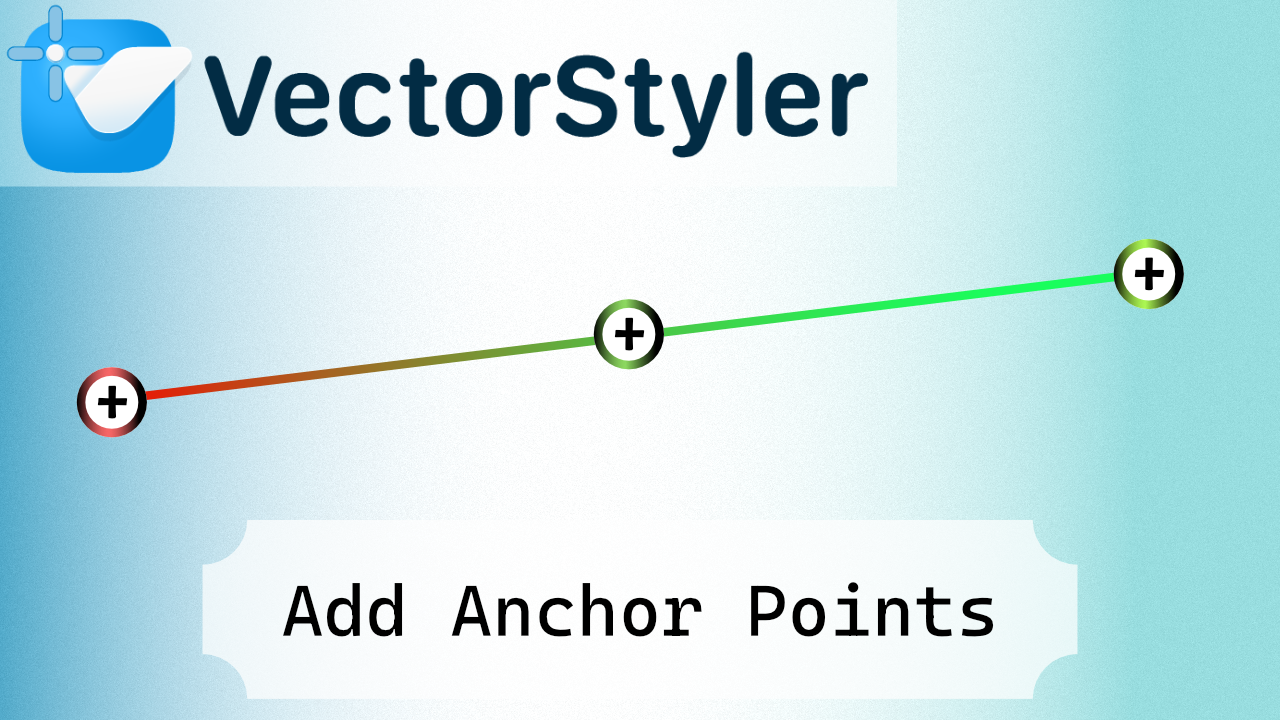
Shorcuts:
(+)
Double Click
Icon
Midpoint with selecting point and +
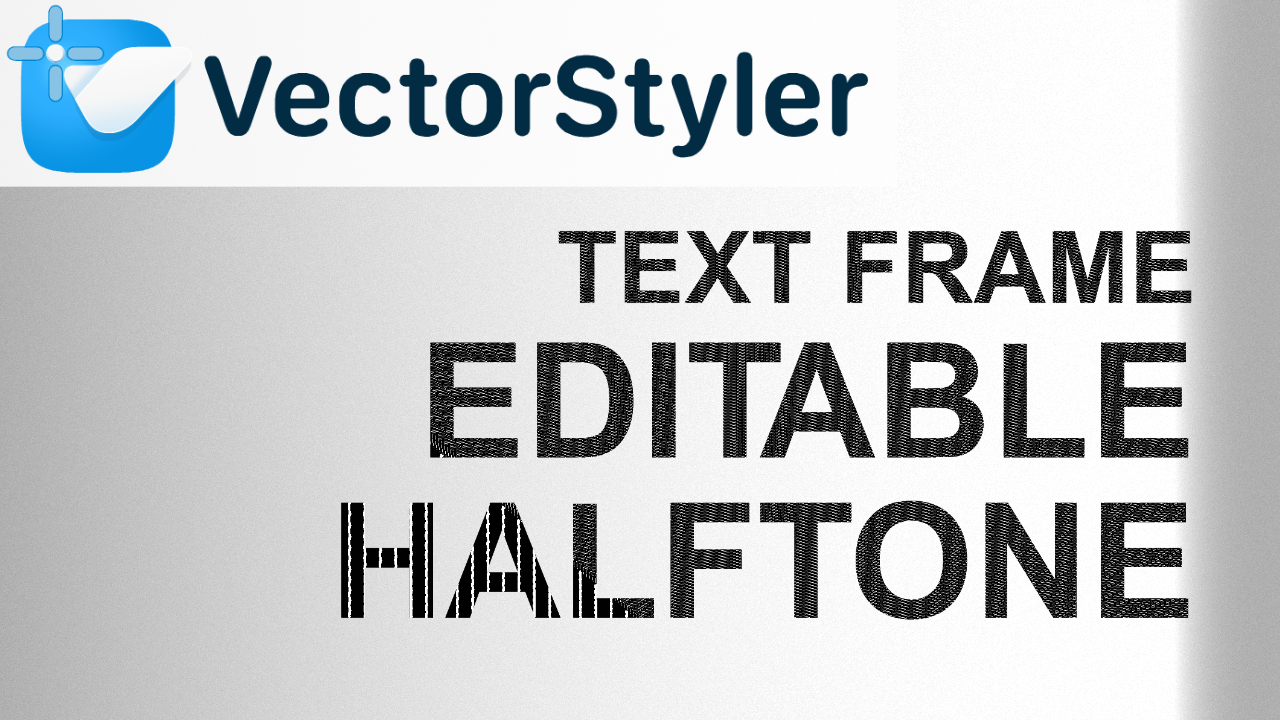
This video covers how to create an editable halftone text effect using a Text Frame in VectorStyler. Unlike other approaches, the Text Frame itself does not allow applying a halftone directly, so the effect must be added through the Effects panel instead.
This workflow keeps the result fully non-destructive, allowing you to preserve the text while still achieving a flexible halftone effect. This video builds on the previous part and continues exploring different methods and limitations when working with halftone in VectorStyler.
This is one way to do it, but I haven't yet found the way to achieve the full halftone panel effect.
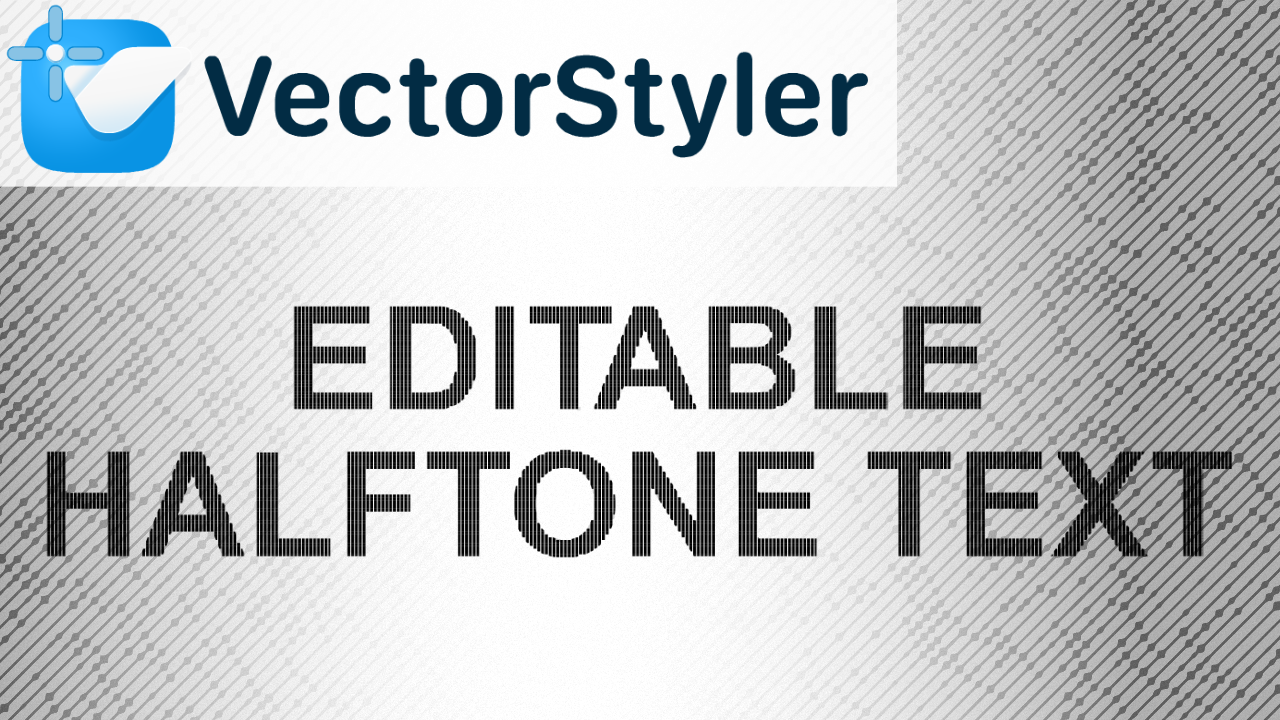
This video covers one of the Halftone modes available in VectorStyler, focusing on how to create an editable halftone text effect using Shape Text. This is just an introduction to the tool and its workflow, aimed at understanding how the effect behaves in a non-destructive way, without the need to expand or break the text.
There are several other Halftone modes and variations that will be explored in future videos. In addition, more specific tutorials will be dedicated to creating particular visual styles and effects using halftone.
Thanks for the help
Hi
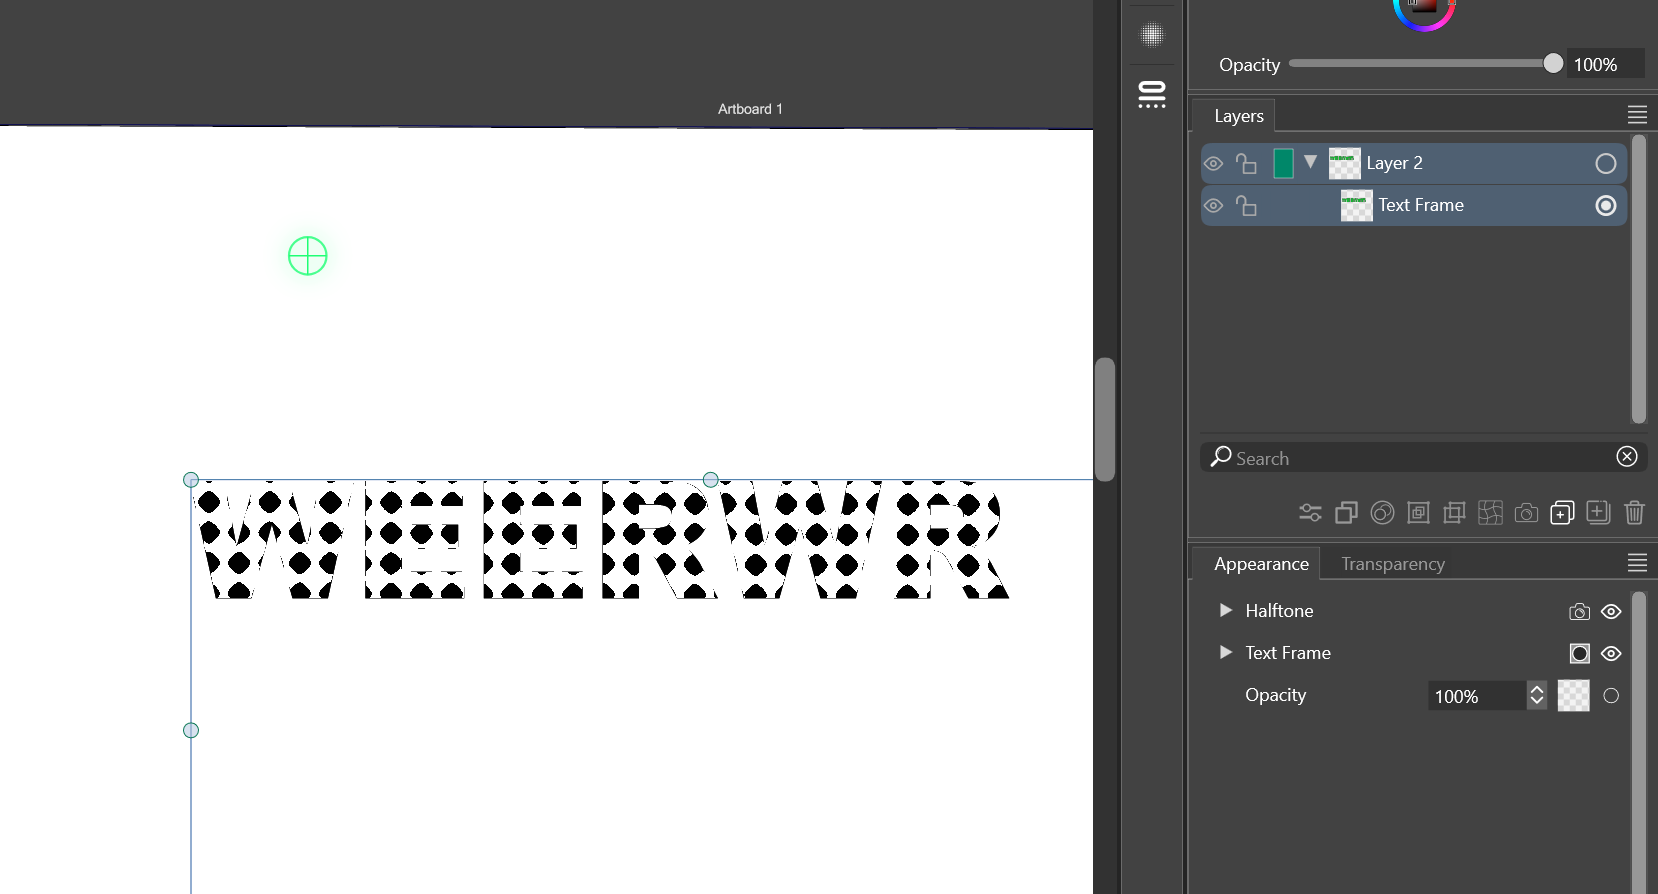
I wanted to halftone text, and it wasn't possible, but I started frantically pressing buttons, and somehow, I managed to do something with the halftone and appearance buttons.
I wanted to make a tutorial. I tried fill and halftone, and it didn't work.
Here's the verifiable result, showing that it's possible, but I have no idea how to do it again.
Some clues and problems:
The text frame is calculated at the border, the fill fills the box, and the border is the border of the box. The problem, then, is that the text exists, but it's "empty" as an element.
If anyone knows how to stroke the text like an outline, perhaps this can be achieved.
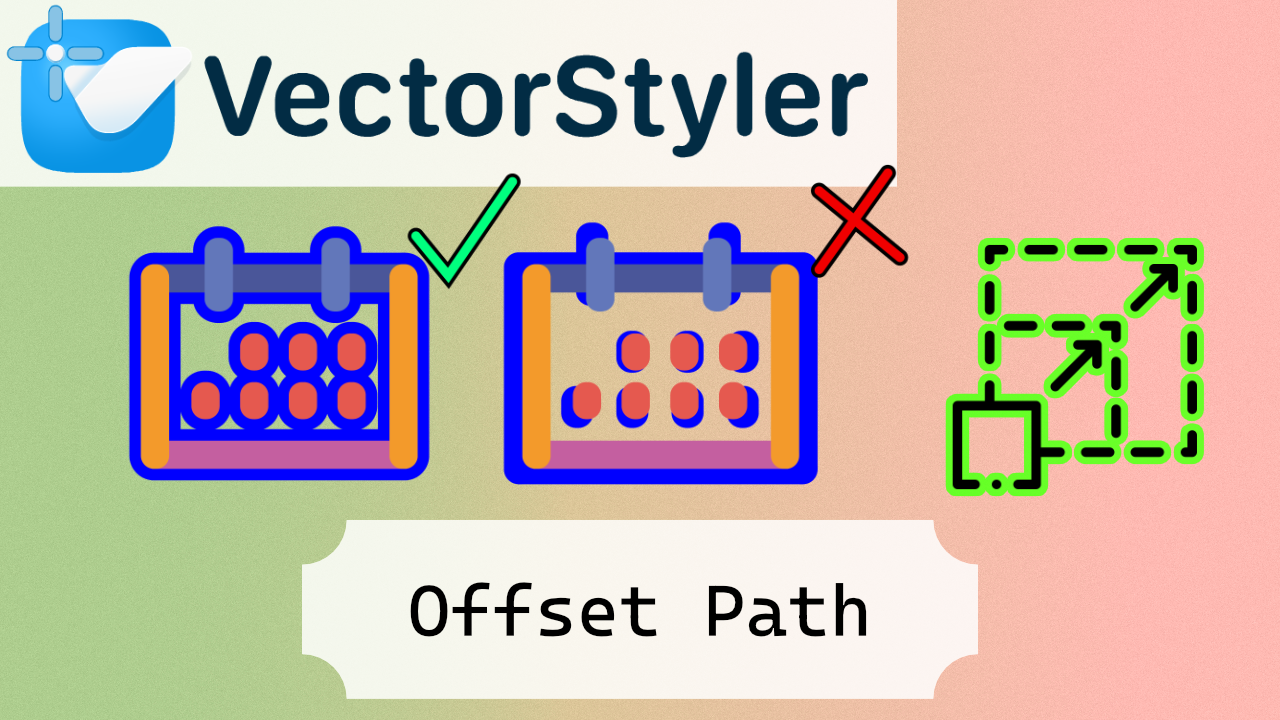
In this VectorStyler tutorial, I show you how to use Offset Path to create duplicates of your shapes and generate an outline from those copies, all while learning how to resize objects proportionally without distortion. You’ll see step by step how to expand or shrink shapes evenly, maintain their proportions, and create clean outlines from duplicates.
Hoy no he tenido tiempo para esto, porque he estado de fiesta todo el día, así que no sé, mañana seguiré de fiesta :v
Tengo algunas ideas
Porque recuerdo que una vez abrí el modo view outline en Illustrator, que tiene otro nombre, pero es el comando ctrl y
Y entré en pánico, así que para la pobre alma en desgracia que le toque pasar lo mismo, voy a ir haciendo un tutorial de como salir del modo outline
Otro tutorial para el otro escalado, scale with stroke pal próximo
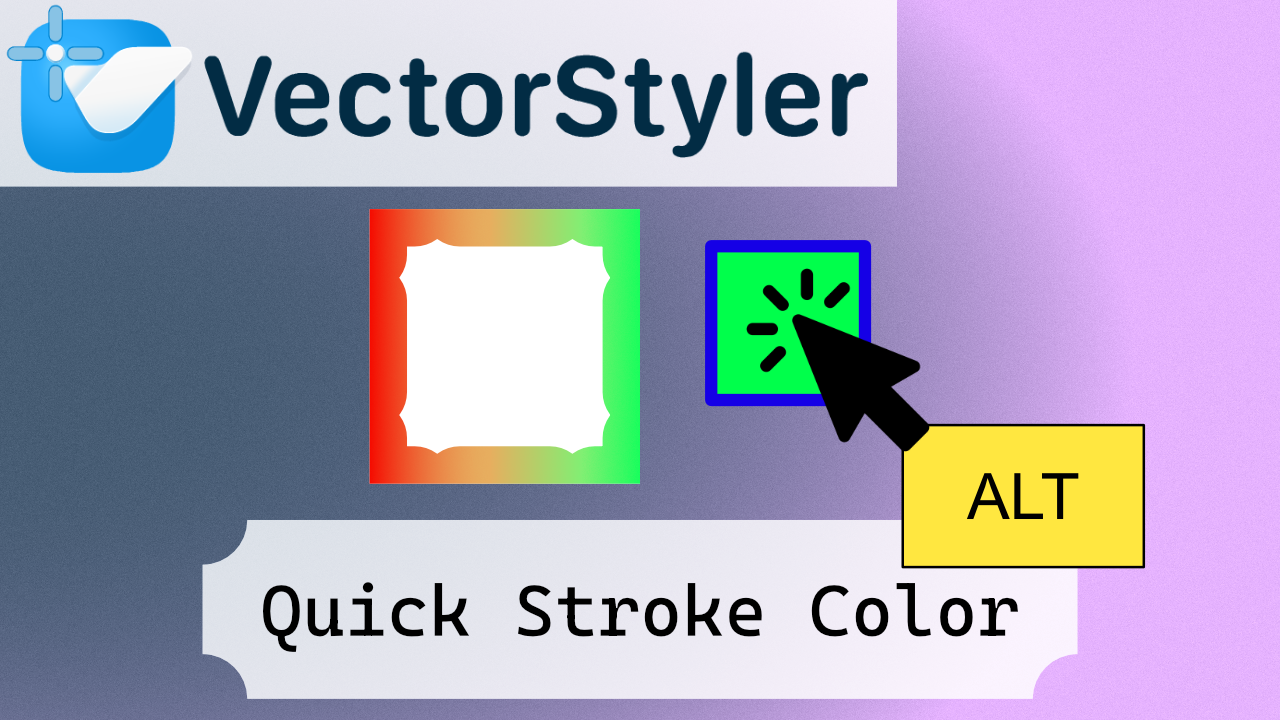
Quick tip for speeding up your workflow in VectorStyler. In this video, I show how to quickly set the stroke color using a simple Alt-click directly from the color palette. It’s a small shortcut, but it can save a lot of time when you're working with strokes constantly.
This is especially useful if you're trying to stay focused on styling without jumping between panels or breaking your flow.
Big thanks to @ericp for pointing this out!
If you have any more interesting suggestions, I'll try to replicate them and make a video.
I have all my video editing setup, so I can publish quickly!
I want to fill YouTube with tutorials. Generally, when you start using new competing software, like Nomad Sculpt, it's similar to what you already know, but having all the tutorials for other software often limits your perspective. So my plan is to create tons of tutorials for new softwares.
By the way, does anyone know how to delete sections created in the artistic brush tool?
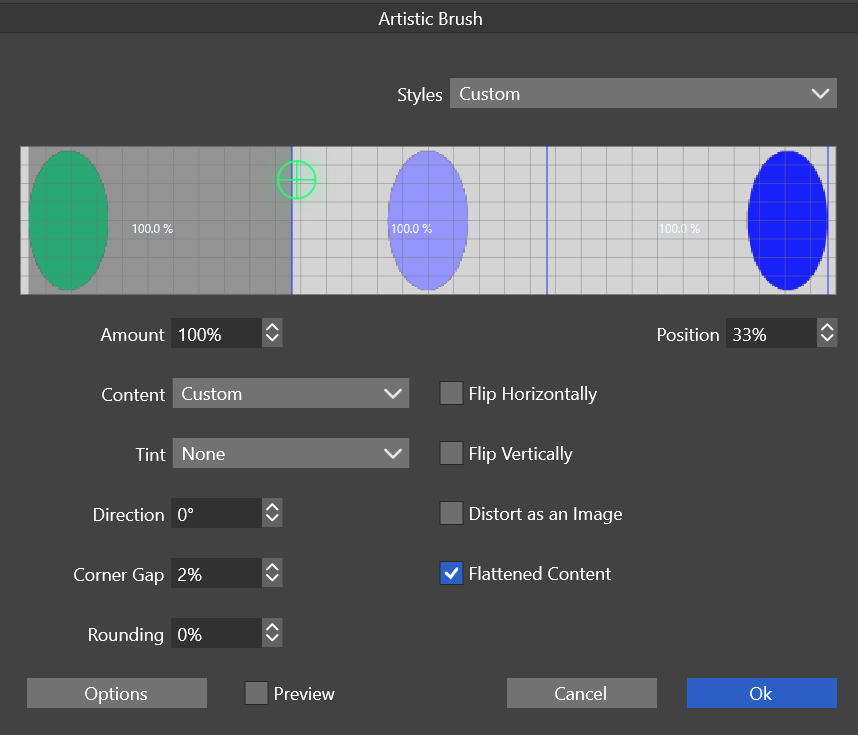
https://www.vectorstyler.com/documentation/brushes/artistic/
When creating a repeater aligned to a curve, the geometry adjustment panel won't show a preview. Am on a Silicon Mac 26.3.1. However when I click OK to apply the the Repater and re-open it, the preview does work.